
Retail strip-out / Toronto
Retail strip-out in Toronto
Prepare the unit for its next use.
Retail strip-out in Toronto and North York. Review tenant fixtures, flooring, ceilings, storefront boundaries and the landlord’s handover requirements.
Define the work
Retail strip-out,
with the details in view.
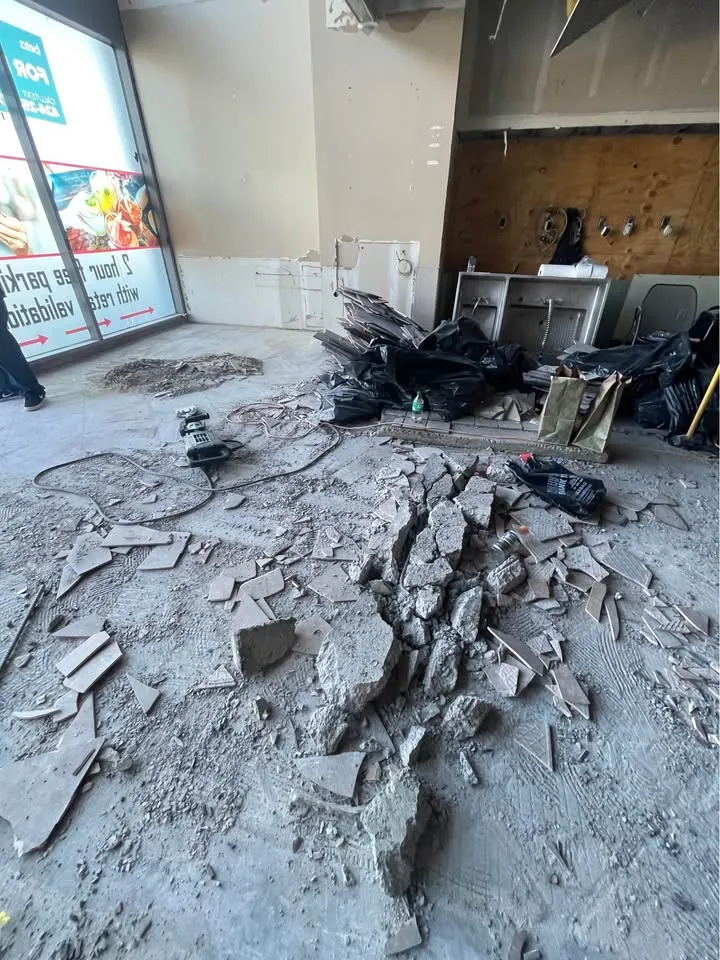
A retail unit can contain display fittings, counters, partitions, signage and finishes installed at different times. Identify which belong to the tenant, which remain with the property and which the incoming design will reuse. Clearpath can assess the removal against that inventory rather than assume every visible fitting should leave.
Glazing, exterior signage, entrance assemblies and shared building elements need specific review. They are not automatically part of an interior strip-out. Supply the lease-end requirement or fit-out drawing and note differences between those documents and the current unit.
Explain how the unit is accessed
A shopping centre, mixed-use building and street-front unit have different access arrangements. Share the building’s actual requirements for deliveries, protection, loading and work windows. Identify neighbouring occupants and public areas that must remain accessible; do not assume the customer entrance is a suitable debris route.
Agree what the next contractor receives
Removing flooring can reveal a surface that needs further preparation. A removed counter may leave service connections requiring qualified work. Allocate those responsibilities and the acceptance process in advance. The objective is a defined handover, not a claim that the unit will automatically suit the next tenant.
Before anything comes out
Keep the boundaries clear.
A useful estimate identifies responsibilities and exclusions as well as the removal itself.
- Separate tenant fittings from retained storefront and common systems.
- Check the lease or drawings against the actual premises.
- Confirm loading and protection requirements with management.
- Specify retained surfaces, debris removal and acceptance responsibilities.
A clear path forward
A practical way to get started.
Show the removal
Retail fixtures and tenant-finish removal. Identify what needs to stay alongside it.
Resolve the conditions
Separate tenant fittings from retained storefront and common systems.
Confirm the handover
Specify retained surfaces, debris removal and acceptance responsibilities.
Through the lens
See the removal in context.
Local to the conversation
Across Toronto, the GTA and beyond.
We provide this service across our GTA and surrounding Southern Ontario coverage. Send the job address and proposed work so we can plan the right next step.
See the coverage directoryDoes this include removing the shopfront?
Can one sales area stay open?
Can you work from the lease clause alone?
Connected to your project
Other work you might need.
Office strip-out
Office strip-out enquiries in Toronto and North York. Define partitions, ceilings, flooring and fittings while protecting retained base-building systems.
Restaurant strip-out
Restaurant strip-out enquiries in Toronto and North York. Define kitchen finishes, counters and equipment removal around gas, plumbing and building systems.
Flooring removal
Flooring removal in Toronto and North York. Discuss tile, wood and other finish layers, retained substrates, access and the condition needed for the next floor.
Useful preparation
Read before you remove.
A commercial strip-out handover checklist
Align landlord, tenant and contractor expectations before the unit is stripped. Define the retained systems and the condition that will be accepted.
Read the guideHow to compare demolition estimates
Compare removal limits, responsibilities, exclusions and handover conditions before comparing the total. A useful comparison starts with the same job.
Read the guidePut your scope into words.
Use the planner to organise what goes, what stays and what needs checking.
Plan this projectYour next step
Let's work through your project.
Tell us about the property, the removal and what comes next. We can start with the scope.